When you’re ready to spool a spinning reel, start by gathering the right tools and choosing the appropriate fishing line. You’ll need a clean workspace, a microfiber cloth, and some line conditioner. Once you’ve secured the reel to a fishing rod, check the drag adjustment and spool tension to guarantee everything’s in order. Next, attach the Line to the spool with a secure knot. But how do you maintain the right tension and avoid those pesky twists and tangles? Let’s explore your steps for an even and efficient spool.
Key Takeaways
- Secure the reel to a fishing rod and check drag adjustment and spool tension.
- Attach the Line to the spool using a knot and secure it with electrical tape.
- Apply light and consistent tension while reeling the Line onto the spool.
- Fill the spool evenly, leaving a slight gap to prevent overfilling.
- Trim the line end and secure it with electrical tape to ensure smooth casts.
Gather Necessary Tools
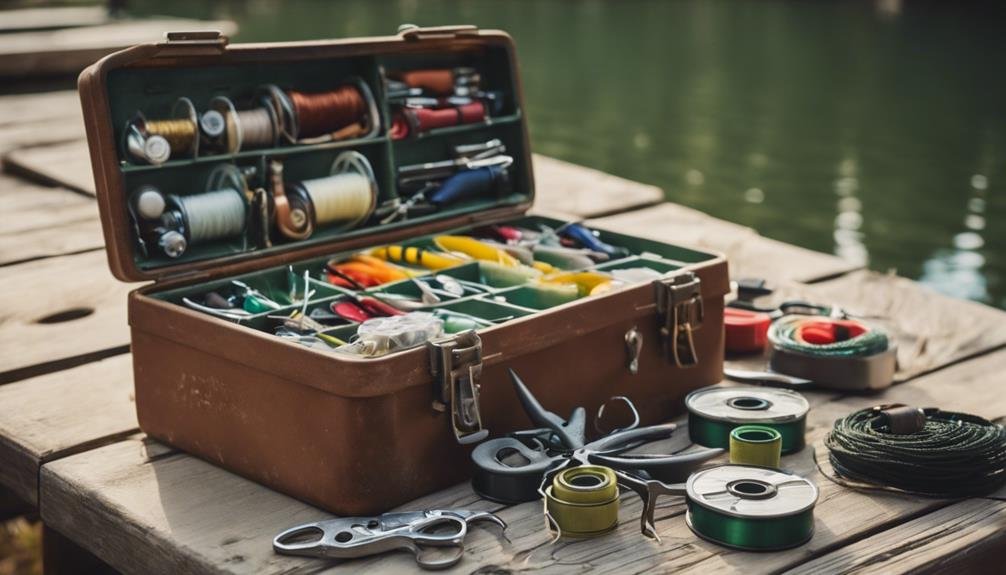
Before spooling a spinning reel, gather essential tools like the reel, fishing line, microfiber cloth, and line conditioner. Having these on hand will streamline the process and help you avoid interruptions. A clean and organized workspace is important for ensuring everything goes smoothly.
One often overlooked but crucial item is a small piece of electrical tape. This tape is important, especially if you’re using a braided line. Using a small piece of electrical tape to secure the Line to the spool prevents slippage, making reeling in a catch much smoother.
Place the tape directly on the spool before you start winding the Line. This small step can make a big difference in your overall fishing experience.
Also, a handy microfiber cloth will help keep your hands and reel clean, particularly if the line conditioner makes things slippery. Line conditioner can minimize line memory and tangles, so it’s a good idea to have it nearby.
Choose the Right Line
When selecting the appropriate Line for your spinning reel, consider the line type—monofilament, fluorocarbon, or braided—and how it fits your fishing conditions.
You must balance the Line’s strength and durability with its casting performance.
Confirm that the Line matches your reel’s capacity and is suitable for the fish species you’re aiming for.
Line Type Selection
Selecting the right line type for your spinning reel is crucial for achieving the best fishing results. When spooling a spinning reel, you must consider factors like line twist, fishing conditions, target species, and reel capacity.
Monofilament lines are versatile, stretchable, and cost-effective, making them perfect for beginners and general fishing purposes. They help reduce line twist during spooling, guaranteeing a smoother fishing experience.
Braided lines, on the other hand, offer high strength and sensitivity, along with thin diameters that increase your reel’s line capacity. They’ve minimal stretch, which enhances your ability to detect bites. Braided lines might be your best choice if you’re targeting larger species or fishing in heavy cover due to their durability and performance.
Fluorocarbon lines are known for their low visibility, making them ideal for clear water conditions and finesse fishing. Their abrasion resistance and sink ability make them a top choice when you need to get your bait deeper. However, they can be more challenging to manage, so ensure you’re comfortable handling them.
For peak performance on the water, choose the best line type based on your specific fishing needs, casting preferences, and budget constraints.
Line Strength Consideration
Choosing the right line strength is vital for matching your reel’s capabilities and the fish you’re targeting. When selecting line strength for spinning reels, start by considering the species of fish you’ll be angling for and the conditions you’ll be fishing in. For larger fish, thicker lines offer the durability and strength to handle their weight and fight. However, remember that thicker lines can reduce your casting distance, which might be a drawback in certain fishing scenarios.
Always check the reel’s recommended pound test when using spinning reels, which indicates the best line strength for that reel. Matching the line strength to these specifications ensures top performance and reduces the risk of breaking your Line under pressure. Thinner lines, however, provide better sensitivity and enhanced casting distance, which can be beneficial when targeting smaller or more cautious fish.
Balancing the line strength with your reel’s capacity and fishing technique is important. By doing so, you’ll maximize your chances of a successful catch without compromising the functionality of your equipment.
Properly considering line strength will greatly enhance your fishing experience with spinning reels.
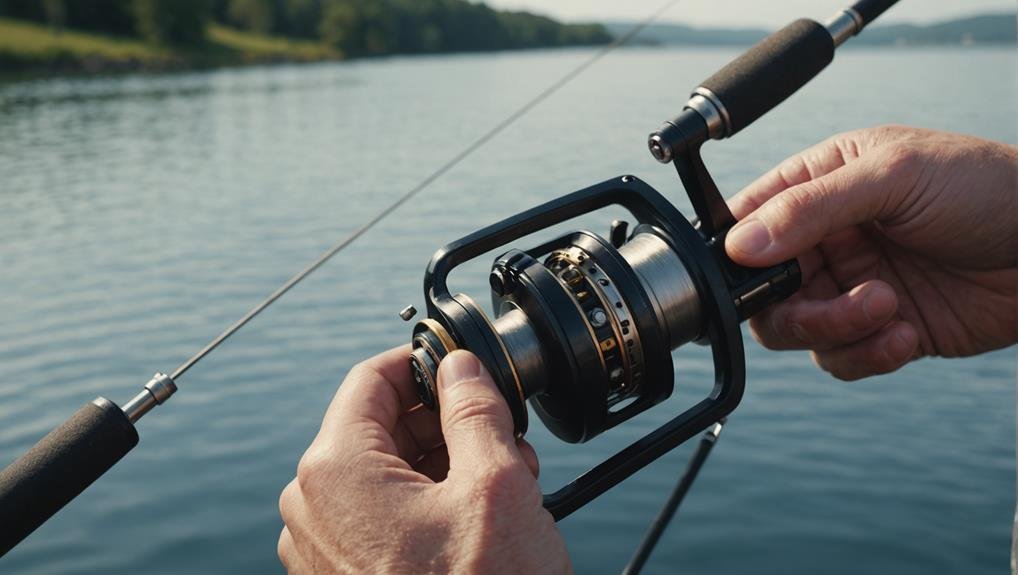
Prepare the Reel
First, gather all necessary tools, including your fishing line and scissors.
Secure the reel to your rod, ensuring it’s mounted correctly with the handle on your dominant side.
Check that the drag adjustment, spool tension, and line roller are all functioning smoothly.
Gather Necessary Tools
Secure your spinning reel to a fishing rod for stability and proper alignment. This step is essential to guarantee the reel doesn’t move around while you’re spooling the Line.
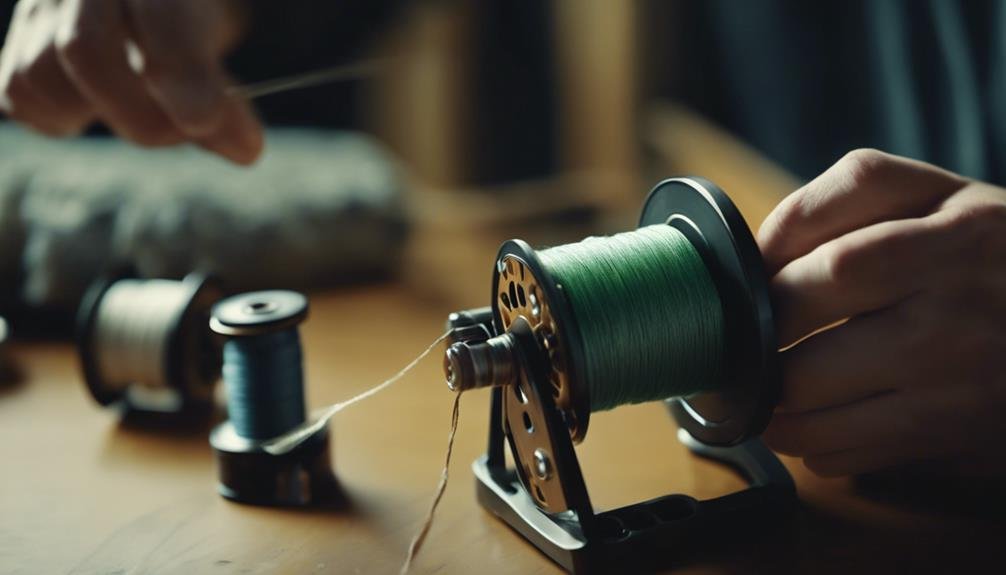
First, gather all the necessary tools. You’ll need your spool of fishing line, a small piece of electrical tape, scissors, or a line cutter.
Before spooling, check the reel’s drag system and spool tension. Properly adjusted tension prevents line slippage during the spooling process.
Next, examine the line roller and bail arm to ensure they operate smoothly. This will help distribute the Line evenly on the spool.
It is important to use the right fishing line size and type. Match it with the reel’s capacity and the fishing conditions you expect.
Position the reel handle so it’s comfortable to turn, and maintain consistent tension as you spool the Line.
Secure the Reel
Confirm that your spinning reel is correctly positioned with the Line feeding off the spool counterclockwise. This guarantees smooth line transfer to the reel. Next, open the bail or feed the Line beneath it. Tie the fishing line to the reel spool using a secure knot like the arbor knot. This step is vital for preventing any line slippage during casting and retrieval.
To further secure the Line, use a small piece of electrical tape. This is especially important if you’re using a braided line, which can be slippery. Even with monofilament or fluorocarbon lines, adding tape is a good practice to avoid potential issues.
| Task | Action |
|---|---|
| Position the reel | Line feeds off spool counterclockwise |
| Open the bail | Please make sure the Line is fed under it |
| Tie the Line to the spool | Use a secure knot |
| Add electrical tape | Use a small piece to secure the Line |
Properly securing the Line to the reel is essential. It helps prevent line twists, tangles, and other complications while fishing. These steps will make your spooling process efficient and trouble-free, setting you up for a successful fishing experience.
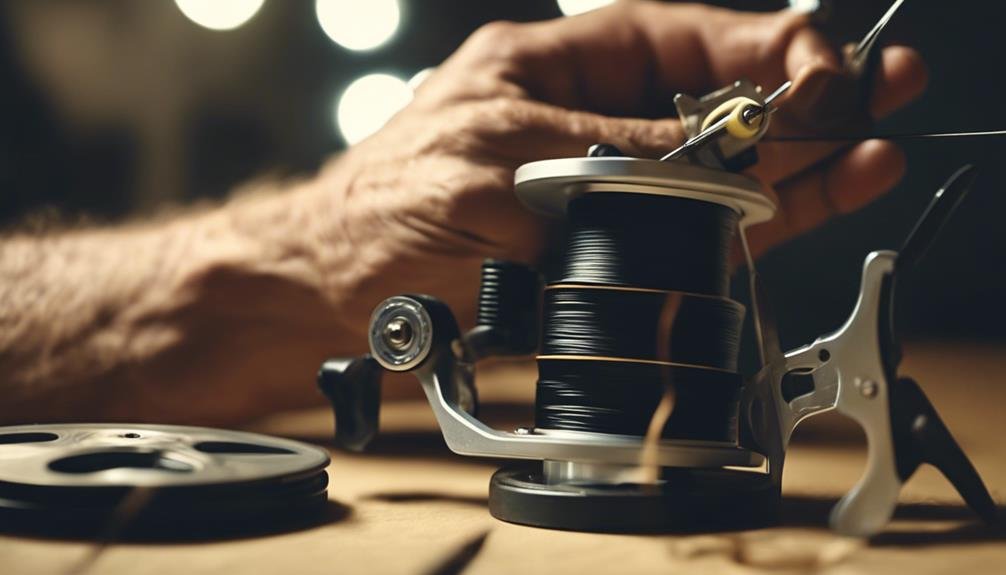
Attach the Line
Before spooling, open the bail of the spinning reel to prevent obstructions. This step is vital for guaranteeing a smooth and hassle-free process.
Next, grab your fishing line and thread it through the guides of your rod, starting from the tip. Once you’ve done that, it’s time to attach the Line to the spool securely. To do this, use an arbor knot. First, wrap the Line around the spool and tie an overhand knot around the standing Line. Then, tie another overhand knot in the tag end of the Line. Pull both knots tight and trim any excess line. This creates a secure attachment that won’t easily come undone.
Now, to prevent the Line from slipping during spooling, especially if you’re using a braided line, take a small piece of electrical tape and place it over the knot on the spool. This adds an extra layer of security and ensures that the Line stays in place as you spool it onto the reel.
Properly securing the Line is essential for maintaining tension and avoiding potential issues while fishing.
Secure With Tape
Using electrical tape to secure the fishing line to the spool is essential to guarantee it stays in place during your fishing trip. This practice is particularly important when dealing with braided lines, which tend to slip more than other types of lines.
To keep everything secure and efficient, follow these steps:
- Cut a small piece of electrical tape: About 2-4 inches should suffice. This will be used to anchor the Line to the spool.
- Attach the Line to the spool: Wrap the Line around it once, then place the small piece of electrical tape over the Line, pressing it firmly against the spool.
- Ensure a tight and secure connection: This step prevents the Line from slipping, which can lead to tangling or knot formation during casting and retrieval.
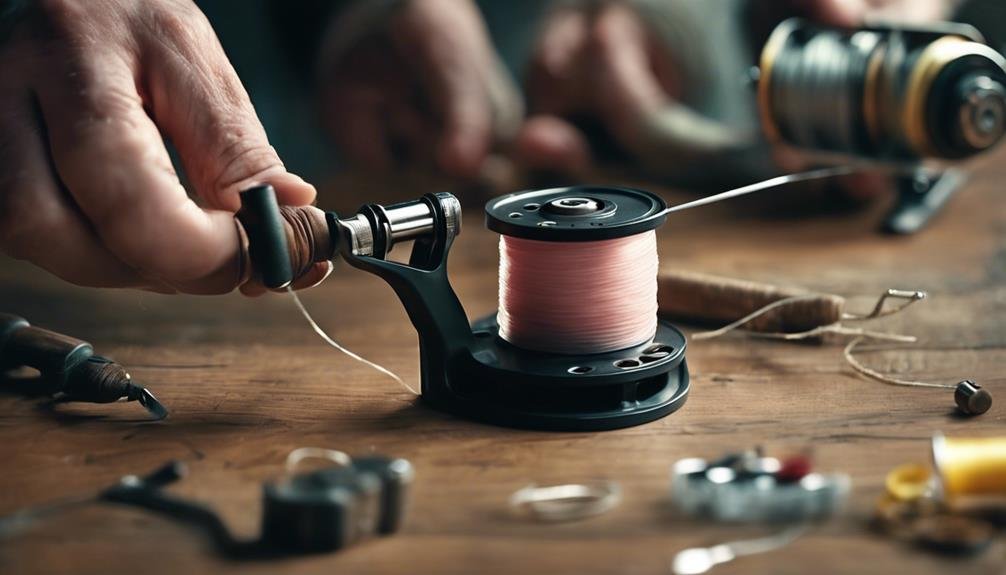
Apply Tension
You are consistently applying light tension while spooling guarantees the Line is evenly distributed and helps prevent future tangles. To achieve this, grasp the Line between your fingers, using enough pressure to keep it taut as you reel it onto the spool. This light, consistent tension is important for effective line management, ensuring the Line maintains its integrity and doesn’t twist.
You’ll want to avoid excessive tension, which can lead to line breakage or damage. Instead, aim for a balance that keeps the line snug but not overly tight. Proper tensioning while reeling ensures the Line is packed tightly on the spool, essential for achieving best casting distance and accuracy.
Fill the Spool
To fill the spool correctly, you’ll want to reel in the Line evenly while maintaining slight tension. This helps prevent line twists and tangles, guaranteeing a smoother casting experience.
Start by attaching the Line to the spool using an arbor knot. Once secured, place a small piece of electrical tape over the knot. This tape will help minimize line slippage and keep the Line in place as you spool.
As you reel in the Line, apply gentle pressure with your fingers. This tension is vital for winding the Line tightly and evenly around the spool. Aim to fill the spool until there’s about a 1/8-inch gap between the Line and the spool’s edge. Overfilling can lead to tangles, while underfilling reduces casting distance.
Here are three key steps to follow:
- Attach the Line Securely: Use an arbor knot and a small piece of electrical tape to anchor the Line.
- Maintain Tension: Keep slight pressure on the Line to ensure it spools evenly.
- Leave a Gap: Stop spooling when there’s a 1/8-inch gap between the Line and the spool’s edge.
Final Adjustments
Guarantee the Line is trimmed to about 1/8 inch from the spool edge for peak performance. This small gap prevents overfilling and casting issues, ensuring better control and accuracy. Proper tension is essential, so use a small piece of electrical tape at the bottom of the spool to secure the line end. This step helps prevent line ballooning during casting and reduces tangles.
Final adjustments are necessary for optimal casting performance and fishing success. Trimming the excess Line maintains proper tension, essential for smooth casts. This reduces the risk of line twist, ensuring a more enjoyable and productive fishing experience.
Here’s a quick reference table:
| Adjustment Step | Purpose | Result |
|---|---|---|
| Trim Line to 1/8 inch | Prevent overfilling | Better casting control |
| Use electrical tape | Secure line end | Prevent line ballooning |
| Maintain small gap | Ensure proper tension | Reduce tangles |
| Properly spooled reel | Achieve optimal performance | Improved fishing success |
Following these steps ensures your spinning reel is ready for action. Making these final adjustments allows you for a hassle-free fishing trip with excellent casting performance. Remember these tips, and you’ll enjoy smoother and more accurate casts every time.
Conclusion
Now that you’ve spooled your spinning reel, you’re ready for your next fishing adventure. Remember to keep your workspace organized and maintain light, even tension, while spooling.
Your reel will perform smoothly with the right tools, proper preparation, and a few final adjustments. Enjoy casting confidently, knowing you’ve set yourself up for a successful outing.
FAQs
Why is it important to spool a spinning reel correctly?
Spooling a spinning reel correctly is crucial because:
- Prevents Line Twists: Proper spooling helps avoid frustrating line twists and tangles.
- Ensures Smooth Casting: A well-spooled reel allows for smoother and longer casts.
- Improves Line Management: Proper spooling helps the Line lay evenly on the reel, reducing the risk of backlash or loops.
What materials do I need to spool a spinning reel?
To spool a spinning reel, you’ll need:
- Fishing Line: Choose the appropriate line type and strength (monofilament, fluorocarbon, or braided) for your fishing needs.
- Spinning Reel: Ensure the reel is compatible with your rod and Line.
- Rod: Attach the spinning reel to the rod to make spooling easier.
- Scissors or Line Clippers: These cut the Line after spooling.
- Towel or Soft Cloth: Hold the Line with light tension while spooling.
How do I spool a spinning reel step by step?
Follow these steps to spool a spinning reel:
- Attach the Reel to the Rod:
- Begin by securely attaching the spinning reel to the rod. This makes handling the reel easier during spooling.
- Open the Bail:
- Flip open the reel’s bail arm. This is crucial as it allows the Line to be wound onto the spool correctly.
- Tie the Line to the Spool:
- Take the end of the fishing line and tie an arbor knot around the reel’s spool. Make sure the knot is tight to prevent slipping.
- Close the Bail:
- After tying the knot, close the bail arm. This prepares the reel for spooling.
- Align the Line with the Reel:
- Place the fishing line spool on the floor or a flat surface. Ensure that the Line comes off the spool in the same direction as it will be wound onto the reel (counterclockwise) to help prevent line twists.
- Apply Light Tension:
- Use a towel or soft cloth to hold the Line between your fingers with light tension. This tension helps the line wind tightly and evenly onto the spool.
- Begin Spooling:
- Start slowly reeling the handle of the spinning reel. As you reel, the Line will start winding onto the spool. Keep applying light tension to ensure the Line is tight and even.
- Fill the Spool:
- Continue reeling until the spool is about 1/8 inch from the rim. Avoid overfilling the spool, which can cause line tangles and affect casting.
- Cut the Line:
- Once the spool is filled, scissors or line clippers cut the Line from the supply spool.
- Secure the Line:
- To prevent the Line from unraveling, secure the end of the Line with the reel’s line clip or tie it to the first guide on the rod.
How many lines should I spool onto my spinning reel?
You should spool enough Line to be about 1/8 inch below the spool’s lip. Overfilling or underfilling can affect casting performance and increase the likelihood of line twists or tangles.
What are some tips to prevent line twists when spooling?
To prevent line twists when spooling:
- Check Line Direction: Make sure the Line comes off the supply spool in the same direction it will be wound onto the reel (usually counterclockwise).
- Use Light Tension: Apply light tension to the Line as you spool it to ensure it winds tightly and evenly.
- Pause and Check: Every few turns, stop reeling and check for twists. If you notice any, let some line off the reel and reel it back on with tension.
How often should I re-spool my spinning reel?
The frequency of re-spooling depends on how often you fish and the condition of your Line:
- Frequent Anglers: If you fish regularly, re-spool your reel every few months to ensure the Line remains strong and twists-free.
- Occasional Anglers: If you fish occasionally, re-spool at least once a year or whenever you notice significant line wear or memory.
- After Big Catches: Consider re-spooling after landing a big fish or if your Line gets badly twisted or damaged.
Following these steps and tips, you can spool your spinning reel correctly, ensuring a smooth fishing experience with fewer line issues. A properly spooled line enhances casting distance, accuracy, and overall enjoyment on the water.