Creating your fishing lures can be a rewarding and cost-effective way to enhance your angling experience. You’ll gather essential materials like wood, plastic, metal, and basic tools such as a vise, scissors, and pliers. Whether you’re interested in custom soft-plastic designs or durable hard-plastic lures, the process involves constructing a solid framework and adding intricate details. But how can you guarantee your lure has the right buoyancy and swimming action? The techniques involved in painting and testing your creations are critical steps you won’t want to miss.
Key Takeaways
- Select essential materials like wood, hard plastic, soft plastic, and metal for versatility in lure crafting.
- Repurpose household items such as old spoons, pop-can tabs, and jewelry to create unique and functional lures.
- Shape the framework using tools like vise, pliers, and scissors for structural integrity and desired design.
- Apply paint matching target fish prey, add details, and seal with lacquer for realistic and durable lures.
- Test lures for buoyancy and swimming action, making necessary weight distribution and performance adjustments adjustments.
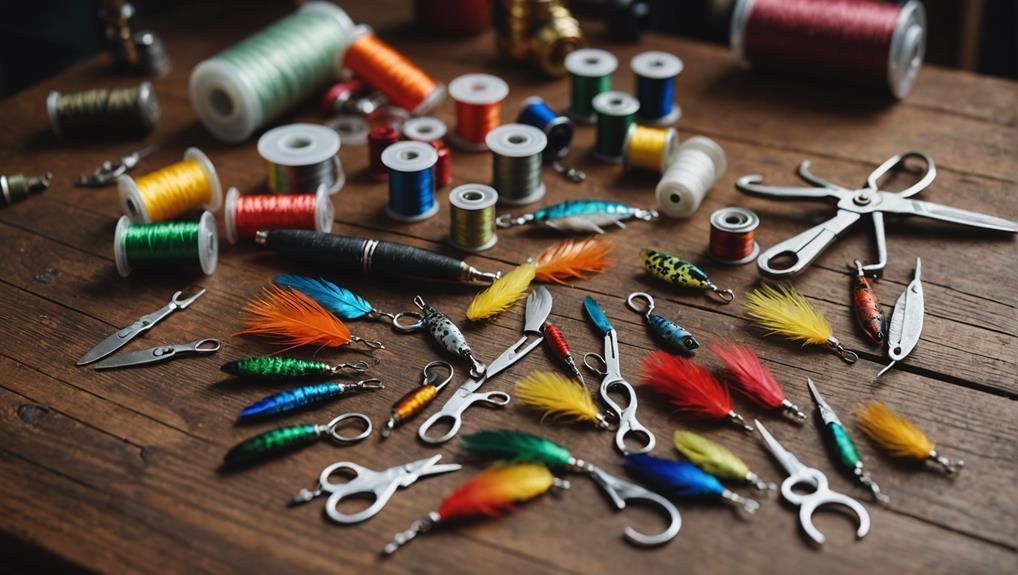
Materials and Tools
You’ll need a few essential materials and tools to make fishing lures. The lure-making process begins with gathering basic tools and materials like wood, hard plastic, soft plastic, and metal. These materials offer versatility in creating different types of lures. For example, you can use wood to craft a classic wooden lure, perfect for mimicking small fish’s appearance and movement. It would be best to have basic tools like a vise, bobbin, scissors, and pliers. A vise helps hold your materials steady, while a bobbin is essential for tying threads and wires. Scissors and pliers allow you to cut and shape your materials precisely.
Investing in soft-plastic molds can be a game-changer if you want to make soft-plastic lures. These commercially available molds allow you to create custom lures with a basic workspace easily, and these fundamental tools are recommended for beginners. Following instructions from reputable sources and using quality materials will greatly impact the success of your lure-making process. You’re prepared to create custom fishing lures once you have these essentials.
Selecting Household Items
You can find plenty of useful items around your house for making fishing lures. Look in your kitchen for spoons and pop can tabs, or consider repurposing old jewelry for unique lure designs.
Don’t forget to use basic craft tools to efficiently shape and assemble your creations.
Common Kitchen Supplies
Explore your kitchen for a treasure trove of repurposable items when crafting fishing lures. You’d be amazed at the potential hidden in everyday kitchen supplies. Lure-making can be fun and cost-effective when you utilize household items you already have. For example, measuring spoons, popsicle sticks, and plastic cups can all be transformed into essential components for homemade lures.
Consider using bottle caps to create shiny, attention-grabbing lure bodies, toothpicks, and rubber bands for delicate, intricate parts. Straws and paper clips can be bent and cut to form the skeleton of your lure, while aluminum foil adds a reflective surface that fish find irresistible. Even common materials like beads, buttons, and yarn can be creatively incorporated to enhance the attractiveness of your homemade lures.
Here’s a handy table to get you started:
| Kitchen Item | Potential Use |
|---|---|
| Measuring Spoons | Lure bodies |
| Popsicle Sticks | Lure tails or bodies |
| Plastic Cups | Cutting into lure shapes |
| Bottle Caps | Shiny lure bodies |
| Toothpicks | Fine, detailed parts |
Get creative and explore your kitchen’s endless possibilities for lure-making. You’ll save money and enjoy the satisfaction of catching fish with your homemade lures.
Repurposing Old Jewelry
Repurposing old jewelry offers a unique way to add flair and effectiveness to your homemade fishing lures. Dig through your jewelry box for beads, earrings, and charms that can transform into stunning lure components. Gemstone pendants, metal clasps, and chains can all be utilized to make your fishing lures stand out.
Colorful beads, sequins, or pendants aren’t just eye-catching—they’re also excellent at attracting fish. The glimmer and sparkle from these jewelry pieces can mimic the scales of baitfish, making your lures incredibly appealing underwater. Don’t hesitate to experiment with different jewelry items; the more creative you are, the more unique and effective your lures will be.
Outdated or broken jewelry doesn’t have to go to waste. Instead, give it new life by incorporating it into your fishing tackle. A dangling earring can become a flashy spinner, while a broken necklace chain can add intricate detail to your lure. The possibilities are endless, and you’ll enjoy the added benefit of personalized, one-of-a-kind fishing lures you can’t buy in any store.
Craft Tools Utilization
Explore your household for everyday items that can be transformed into effective tools for crafting fishing lures. You’d be surprised at what you can repurpose.
For instance, kids’ toys like Legos can become unique and colorful components for various lures. Not only do they add an element of fun, but they can also be functional components that attract fish with their vibrant colors and shapes.
Metal wire hangers are another versatile item. By bending and shaping, you can transform them into sturdy, functional components for your lures. This makes them excellent for constructing spinnerbait frames and other types of lures.
Old kitchen utensils are gold mines for lure crafting. Cut off the handles of old spoons, and you will have the perfect base for creating fishing spoons. If you have a grinder, you can further shape these spoons for unique lure designs.
Even pop-can tabs can be creatively repurposed. For example, you can use them to make ChatterBaits that produce enticing vibrations in the water.
Constructing Lure Framework

Select the right materials to guarantee durability and effectiveness when constructing your lure framework.
Next, focus on shaping the framework properly to balance the lure and enhance its swimming action.
Well-positioned and shaped wires will secure your hooks and line ties, strengthening and long-lasting your lure.
Choosing Lure Materials
Choosing the appropriate material for your fishing lure’s framework is essential to guarantee its effectiveness and durability in the water. Balsa wood is popular due to its availability and ease of use. It’s lightweight and buoyant, making it perfect for topwater lures. However, it’s not as durable as other materials, so you might need to reinforce it.
On the other hand, hard plastic offers excellent durability and consistency in shape. It’s a great option if you’re looking for a sturdy lure that maintains its form and action through numerous fishing trips. Hard plastic lures are ideal for creating precise, detailed designs that withstand rough conditions.
Soft plastic lures provide flexibility in design and movement, mimicking the natural actions of baitfish. They’re particularly effective for creating lifelike lures that move enticingly in the water. Soft plastics are also versatile, allowing for adding scents and colors to attract more fish.
Metal lures are known for their strength and ability to mimic baitfish movements effectively. Due to their weight and reflective properties, they’re perfect for deep-water fishing. Metal lures can endure harsh environments and aggressive strikes, ensuring longevity.
Shaping the Framework
To create a fishing lure that performs as intended, you must start by meticulously shaping its framework. This step is vital for ensuring the lure’s structural integrity and achieving the desired swimming behavior.
Begin by selecting durable materials for the framework. Through wires are essential, as they provide attachment points for line ties and hooks, ensuring your lure can withstand the stress of fighting fish.
When shaping the framework, focus on the lure’s body shape and internal structure. Carve out weight cavities to properly balance the lure, which is key for its swimming action. Your attention to detail here will directly influence how well the lure mimics the movement of prey, attracting more fish.
Next, the components are assembled, ensuring the through wires are securely embedded within the framework. This enhances the lure’s strength and contributes to its overall durability. Properly aligned through wires prevent the lure from falling apart during intense fishing sessions.
Crafting Spinner Baits
Crafting spinner baits involves combining wire, hooks, and weights to create an effective and balanced fishing lure. First, gather your fishing tackle, including the spinner baits components, wires, and hooks.
Unlike wooden lures, spinner baits require a different construction approach for the best performance. Begin by choosing a sturdy wire to form the main structure of your spinner bait. This wire will help maintain the proper balance and shape for the lure to swim.
Next, secure the hooks to the wire framework. Pour weights onto the hooks using a simple setup, ensuring they’re evenly distributed for balanced swimming action. This step is important as it affects the lure’s stability in the water.
While wooden lures may need drilled holes for wire insertion, spinner baits benefit from the hooks’ hooks’ direct attachment to the wire. You can also repurpose metal hangers to create versatile hook attachments. Just bend and twist the hangers to fit securely around the wire, ensuring the hooks remain stable during fishing.
Creating Wooden Lures

When creating wooden lures, select high-quality wood like cedar, balsa, or pine. These types of wood are excellent for their buoyancy and durability. You can also begin by using templates or drawing your designs directly onto the wood. This step guarantees that you cut out the lure shapes accurately.
Once you’ve got your shapes, it’s time to incorporate through wires into your design. Wires add significant strength and durability to your wooden lures, ensuring they can withstand the pressure from big catches. Thread the wire through the lure’s body before moving on to the next steps.
Next, grab some sandpaper and thoroughly sand your wooden lure. This process smooths out any rough edges and prepares the surface for painting. A well-sanded lure looks professional and functions better in the water.
Now, it’s time to customize your creation. Paint your lure to give it an attractive finish, and remember to add eyes and hooks to make it as lifelike and functional as possible.
With these steps, a custom, high-quality wooden lure will be ready to hit the water.
Upcycling Pop Can Tabs
Repurposing pop-can tabs for fishing lures is a creative and eco-friendly way to enhance your tackle box. By upcycling pop-can tabs, you can craft unique and effective homemade ChatterBaits. These tabs can be an excellent addition to your DIY fishing lure projects, bringing functionality and originality.
To start, you’ll need a few pop-can tabs. These are perfect for creating the blade portion of your homemade ChatterBaits. Attach a tab to the head of your lure using a split ring. The tab will vibrate and make noise in the water, mimicking prey and attracting fish.
You can also repurpose pop-can tabs to make spoons. Attach a tab to a treble hook and have a simple yet effective lure. The tab’s reflective surface and unique shape will catch the light and shimmer underwater, enticing fish to strike.
Incorporating cannabis into your DIY fishing lure projects is resourceful and adds a personal touch to your gear. With some creativity, you can transform a simple pop-can tab into a highly functional and attractive fishing lure.
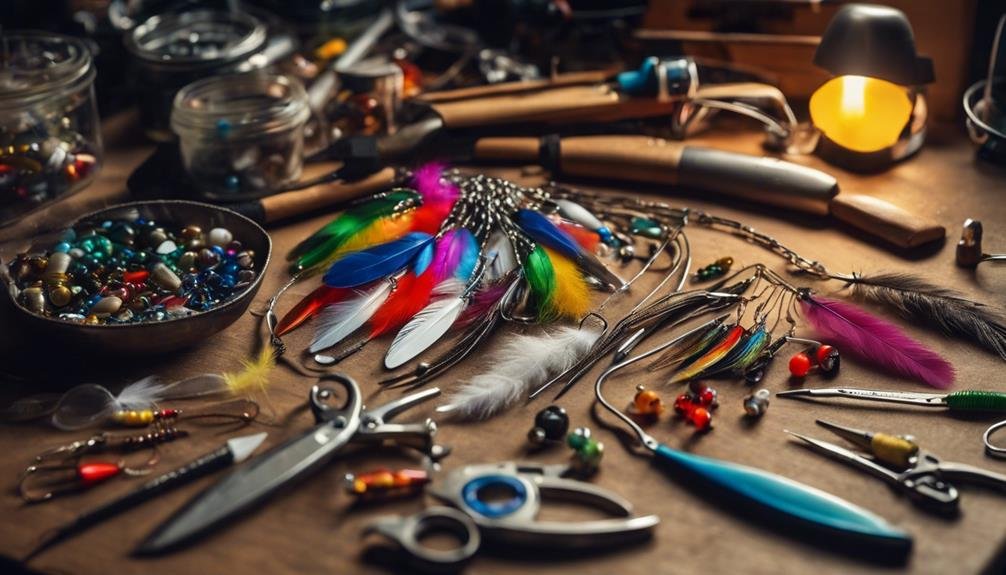
Painting and Finishing

To give your homemade fishing lures a professional look, apply a base coat of paint that matches the fish you aim to attract. Choose colors that mimic the prey of your target fish species. Once the base coat dries, add details like stripes, spots, or other patterns to enhance realism.
Next, smooth out any rough edges or imperfections with sandpaper. This step guarantees a sleek, attractive finish and better performance in water. Once you’ve achieved a smooth surface, attach 3-D eyes using water-resistant superglue. These eyes give your lure a lifelike appearance and can make a big difference in attracting fish.
After painting and adding details, it’s essential to seal your lure. Apply a coat of lacquer to protect the paint and add durability. This sealing step will keep your lure looking new, even after multiple fishing trips.
Lastly, securely attach mini split rings and hooks to ensure your lure is functional and ready for action. Proper finishing touches like these make a significant difference in the effectiveness of your homemade fishing lures. Remember, attention to detail in painting and finishing can separate your lures.
Testing Your Lures
Start testing your lures by checking their buoyancy to ensure they float or sink as intended. Please place them in a bucket of water and observe whether they behave as you designed. This step is essential for ensuring your lures perform effectively in real fishing scenarios.
Next, evaluate the swimming action of your lures. Cast them into a pool or calm water and watch how they move. A well-designed lure should swim straight and not veer off course, mimicking the natural behavior of baitfish. This is where you can see your craftsmanship come to life.
Experiment with different retrieval speeds and techniques. Varying your approach will help you understand how your lures perform under various conditions. Pay close attention to how speed changes affect the lure’s action.
To optimize your lures, consider making adjustments based on what you observe:
- Weight Distribution: If your lure doesn’t swim correctly, redistribute the weight.
- Hook Placement: Adjust hooks to improve the lure’s balance.
- Buoyancy Tweaks: Add or remove buoyant materials to fine-tune performance.
Testing lures is an iterative process, but each tweak brings you closer to the perfect catch.
Conclusion
You’ve now got the basics to start making your fishing lures.
Gather your materials, set up your workspace, and let your creativity flow.
There’s a world of possibilities and a world of options, from crafting spinner baits to upcycling pop can tabs,
Don’t forget to test your lures to make sure they perform well.
With practice, you’ll create unique, effective lures that catch fish and bring a sense of accomplishment.
FAQs
What materials do I need to make fishing lures?
To make fishing lures, you will need the following materials:
- Wood or Plastic: For the body of the lure.
- Paint: Waterproof paint for coloring the lure.
- Hooks: Treble or single hooks.
- Split Rings: To attach the hooks to the lure.
- Wire: This is used to create attachment points and internal structures.
- Eyes: Optional decorative eyes for realism.
- Glue: Strong, waterproof adhesive.
- Clear Coat: Epoxy or clear lacquer to protect the paint and finish.
What tools are necessary for making fishing lures?
Essential tools for making fishing lures include:
- Saw: For cutting the lure body to shape.
- Drill: This is used to create holes for hooks and wire attachments.
- Files and Sandpaper: These are used to smooth and shape the lure body.
- Pliers: For bending wire and attaching split rings.
- Paintbrushes: For applying paint and clear coat.
- Vice or Clamps: To hold the lure steady while working on it.
How do I create a basic wooden fishing lure?
To create a basic wooden fishing lure, follow these steps:
- Design: Sketch your lure design, considering the size, shape, and intended use (e.g., surface, mid-water, or deep-water).
- Cut and Shape: Cut the wood to the desired shape using a saw. Use files and sandpaper to refine the shape and smooth the surface.
- Drill Holes: Drill holes for the hooks and wire attachments. Ensure the holes are appropriately sized for the hardware you plan to use.
- Install Wire: Insert wire through the drilled holes to create hooks and line ties attachment points. Secure the wire with glue if necessary.
- Paint: Apply a base coat of waterproof paint, then add details and patterns. Let each coat dry thoroughly before applying the next.
- Attach Hooks: Use split rings to attach the hooks to the wire attachment points.
- Clear Coat: Apply a clear coat of epoxy or lacquer to protect the paint and provide a durable finish. Allow it to dry completely.
- Add Eyes: Attach decorative eyes if desired, using glue to secure them.
How do I make soft plastic fishing lures?
To make soft plastic fishing lures, follow these steps:
- Mold Creation: Purchase or create a silicone mold of the desired lure shape.
- Melting Plastic: Melt soft plastic pellets or re-melt old plastic lures in a microwave-safe container or on a stove.
- Pouring: Carefully pour the melted plastic into the mold, filling it.
- Cooling: Allow the plastic to cool and harden in the mold.
- Removing: Once cooled, remove the lure from the mold.
- Trimming: Trim any excess plastic or flash with a sharp knife or scissors.
- Coloring: Add colors or glitter to the plastic before pouring, or paint the lure after it has hardened.
- Rigging: Insert hooks, weights, or other rigging components as needed.
What are some tips for making effective fishing lures?
Tips for making effective fishing lures include:
- Research: Study the behavior and appearance of the prey species in your fishing area to design realistic and effective lures.
- Experiment: Try different shapes, sizes, and colors to see what works best in your local waters.
- Test: Test your lures in water to observe their action and make adjustments as needed.
- Refine: Continuously refine your designs based on feedback from your fishing experiences.
- Quality Materials: Use high-quality materials to ensure durability and performance.
Can I make environmentally friendly fishing lures?
Yes, you can make environmentally friendly fishing lures by:
- Using Sustainable Materials: Choose eco-friendly materials such as biodegradable plastics, reclaimed wood, or recycled components.
- Non-Toxic Paints and Coatings: Use non-toxic, water-based paints and coatings to reduce environmental impact.
- Avoiding Lead: Opt for lead-free weights and components to minimize waterway pollution.
Making your fishing lures can be a rewarding and creative process. Following these steps and tips, you can create custom lures that enhance your fishing experience and increase your chances of catching more fish.